Construction dust is not ordinary dust. Drywall compound, sanding residue, sawdust and plaster grind down to a powder fine enough to hang in the air for hours, settle back onto a floor you already cleaned, and scratch a polyurethane finish if you push it around with a wet mop. Cleaning hardwood floors after construction is a sequence problem: the order matters more than the product.
This guide walks through the sequence our post-construction crews follow on renovated homes: dry removal from the top of the room down, HEPA vacuuming, a second pass after the fine dust settles, and only then a single controlled-moisture pass on sealed wood. It also covers what should never touch the floor, how to read paint, adhesive and grout haze, and the point where cleaning ends and a flooring professional begins.
Short answer
Clean hardwood floors after construction in this order: pick up debris by hand, dust every surface above the floor, vacuum with a sealed HEPA vacuum (bare-floor setting, beater bar off), let the airborne dust settle and vacuum a second time, then make one damp pass on sealed wood with a pH-neutral cleaner and a nearly dry microfiber pad.
The safest way to clean hardwood floors after construction is to remove every layer of dust dry before any moisture touches the finish. Start at the top of the room and work down so that ceiling, trim, sill and baseboard dust falls to the floor before you vacuum it. Use a vacuum with a sealed HEPA filter, a soft floor brush and the beater bar switched off; a dry broom or an unfiltered vacuum can lift fine drywall dust back into the air.
Because that dust keeps settling for hours, the floor needs a second dry pass and a side-light inspection before it is really clean. Only on sealed hardwood, and only after the dry passes, use a pH-neutral wood-floor cleaner on a microfiber pad wrung nearly dry, then buff the surface dry.
Steam mops, wet mops, vinegar and abrasive pads stay off the floor. If the renovation disturbed painted surfaces in a home built before 1978, stop and follow lead-safe guidance instead of cleaning it yourself.
What is the safest way to remove construction dust from hardwood floors?
Three things make construction dust different from the dust of daily life, and each one argues for the same method. First, it is abrasive: drywall compound, tile grit and sanding residue sit on the floor like fine sandpaper, and anything that drags them, a broom, a mop head, a shoe, can leave micro-scratches in the finish. Second, it bonds with water. Add moisture to compound dust and you get a thin paste that flows into board seams and bevels and dries there as a grey haze that is far harder to remove than the dry powder was. Third, it is a respiratory issue while it is airborne, and the finest particles stay airborne longest.
Wood-flooring guidance points the same way. The National Wood Flooring Association's maintenance advice is to sweep or vacuum on a bare-floor setting, to avoid wet mops and steam mops, and to use only products made for the specific finish. Where a job involved cutting or grinding concrete, tile, stone or block, the dust may contain respirable crystalline silica; OSHA's silica standard for construction treats dry sweeping and dry brushing as unacceptable housekeeping where they could add to exposure, and names HEPA-filtered vacuuming as the method that minimizes it. Not every renovation produces silica dust, but a properly sealed HEPA vacuum is designed to capture fine particles instead of recirculating them.
So the safest method is dry, filtered and patient: remove what you can without water, capture it instead of moving it, wait for what is still in the air to come down, and only then introduce a controlled amount of moisture to a floor that can take it. Everything below is that method in detail. It is a cleaning process, not sanding, refinishing or floor restoration, and it will not repair a finish that construction traffic has already damaged.
Why should construction dust come off dry before any water touches the floor?
Because water turns a removable powder into an adhesive film. Joint compound is designed to be worked wet and to harden as it dries. Sweep a damp pad through compound dust and you are re-wetting it: the pad pushes a slurry ahead of itself, the slurry runs into the seams between boards and the small bevel along each edge, and when it dries it leaves the white or grey haze that people then try to scrub off. On a polyurethane finish that scrubbing is a common way the finish gets damaged after a renovation.
There is a second reason, and it is the one most DIY guides skip: the dust keeps coming back. Fine particles settle slowly, and every time someone walks through the room, opens a door or the HVAC cycles, part of what settled goes back up. A floor mopped an hour after the trades leave often shows a new film by evening. Two dry passes separated by a settling interval remove the bulk and then the fallout, and a low flashlight held almost parallel to the boards shows whether a third is needed. A clean white microfiber cloth wiped across one board gives the same answer without the light.
How long to wait between passes has no universal number. A small room with the HVAC off and the doors closed settles far faster than an open floor plan with a return vent pulling air across it, and a light sanding job produces a fraction of the dust of a full drywall replacement. Use the inspection, not the clock.
What is Capital Clean Care's 7-Step Post-Construction Hardwood Floor Process?
This is the sequence our crews follow on hardwood after a renovation. Steps 1 to 5 are dry. Moisture appears only in step 6, only on a sealed floor, and only in a controlled amount.
1Jobsite handoff and safety check
The trades are finished, the floor is clear of tools, and nothing is still curing. Walk the room and pick up anything sharp by hand: screws, staples, tile chips, nails, drywall screws that roll under a vacuum head and score the finish. Confirm that paint, adhesive and grout have cured for the time their labels state; wiping over a soft adhesive spreads it. Identify the floor: solid or engineered hardwood, and whether the finish is a surface seal (polyurethane), an oil or hardwax finish, or wax. Everything after this depends on that answer.
Stop here if the renovation disturbed painted surfaces in a home built before 1978, if older floor tile, sheet flooring or mastic was removed or damaged, or if you cannot tell what a material is. Lead dust and suspected asbestos are not cleaning problems: the EPA notes that asbestos cannot be identified by looking, that suspect material should be left undisturbed, and that inspection or sampling is a job for a trained professional. Do not vacuum or sweep it (see the sources below).
2Top-to-bottom dry removal
Dust that is still on the ceiling, light fixtures, window sills, door tops, trim and baseboards will end up on the floor the moment air moves. Work high to low with a dry microfiber cloth, a duster head or a vacuum brush attachment, and let it fall. Baseboards and the joint where the wall meets the floor collect the most compound dust; clear them last, just before the floor. No water is used in this phase at all.
3HEPA soft-brush vacuum
Vacuum the floor with a vacuum that has a sealed HEPA filter, a soft floor brush or bare-floor setting, and the beater bar switched off. A spinning brush roll can throw fine dust back into the air and drag grit across the finish. Work slowly, in overlapping straight passes along the grain, then go back over board seams, bevels, edges and corners with a crevice tool. Do not dry-sweep fine dust: a broom lifts the smallest particles, the ones that hang in the air longest, and leaves the heavier grit behind to scratch.
4Settling interval and second dry pass
Fine drywall and sanding dust does not fall out of the air on the first pass. After vacuuming, the room looks clean while dust is still suspended; it comes down later, in a thin, even film. How long that takes depends on ventilation, HVAC air movement, and how much dust the job produced, so there is no universal number. Leave the room closed for a while, then inspect with a flashlight held low and almost parallel to the boards. Side light makes any film obvious. Wipe a white microfiber cloth across a board: if it picks up grey, vacuum the floor again.
5Residue triage and spot test
What is left after two dry passes is not dust. Look at each mark and decide what it is before anything touches it: compound haze, latex paint specks, adhesive from tape or underlayment, grout haze from adjacent tile work, or caulk smears. Each one has a different safe first action (see the table below). Test any product in a closet or under a radiator first, and follow the floor and finish manufacturer's instructions over anything you read online, including this guide. Never scrape blindly with metal, and never reach for a solvent because a video said so.
6Controlled-moisture final pass on sealed hardwood only
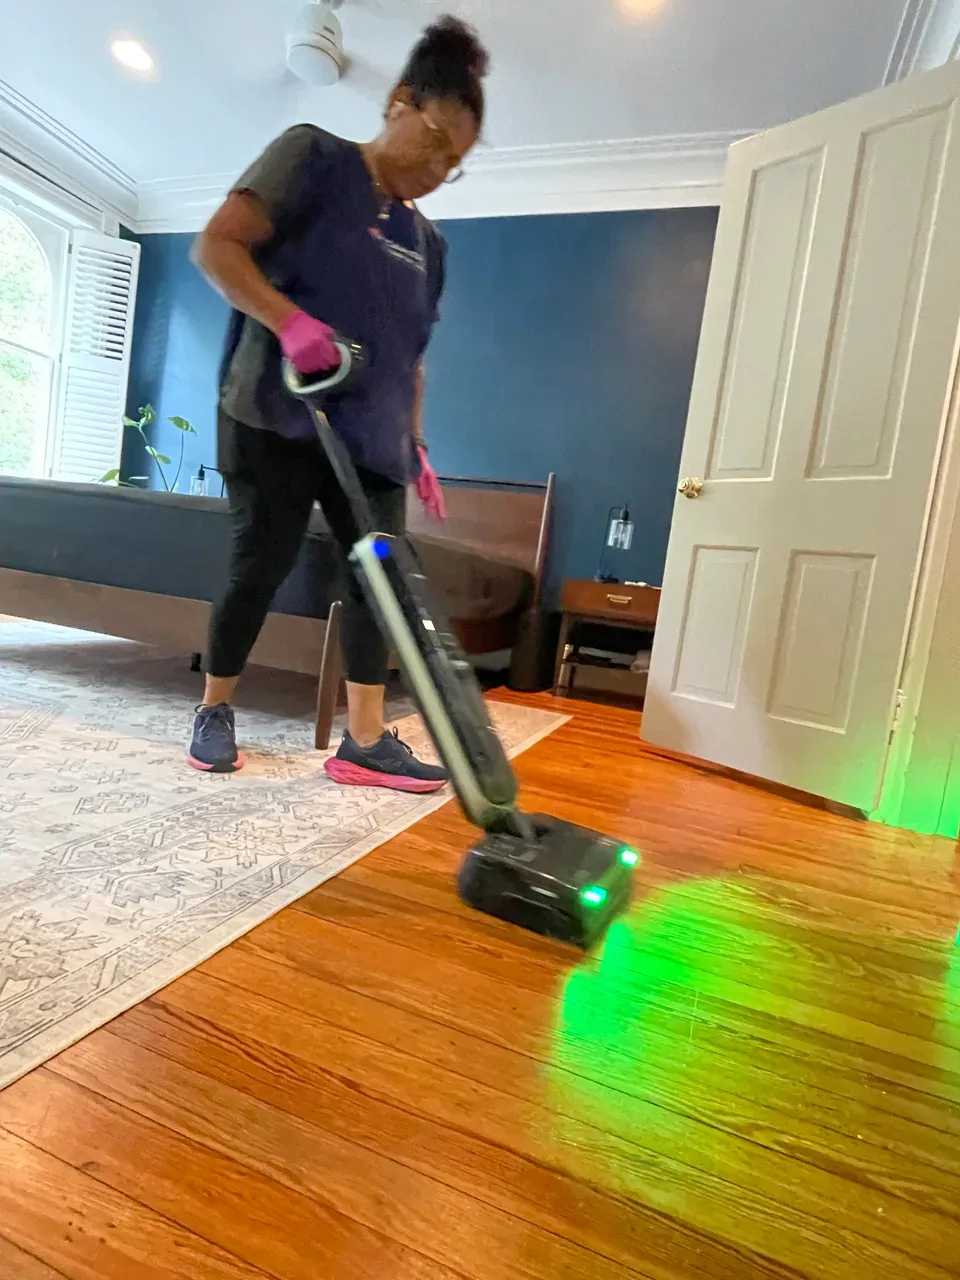
Only now, and only on a surface-sealed floor, does moisture come in. Use a pH-neutral hardwood cleaner approved for the finish, applied to a microfiber pad wrung until it is nearly dry, or a machine designed for sealed hard floors that meters its own liquid. The goal is to lift the last compound film, not to wash the wood. Work along the grain in small sections. Oiled, hardwax or waxed floors skip this step: they get dry buffing and the finish maker's own maintenance product, nothing else.
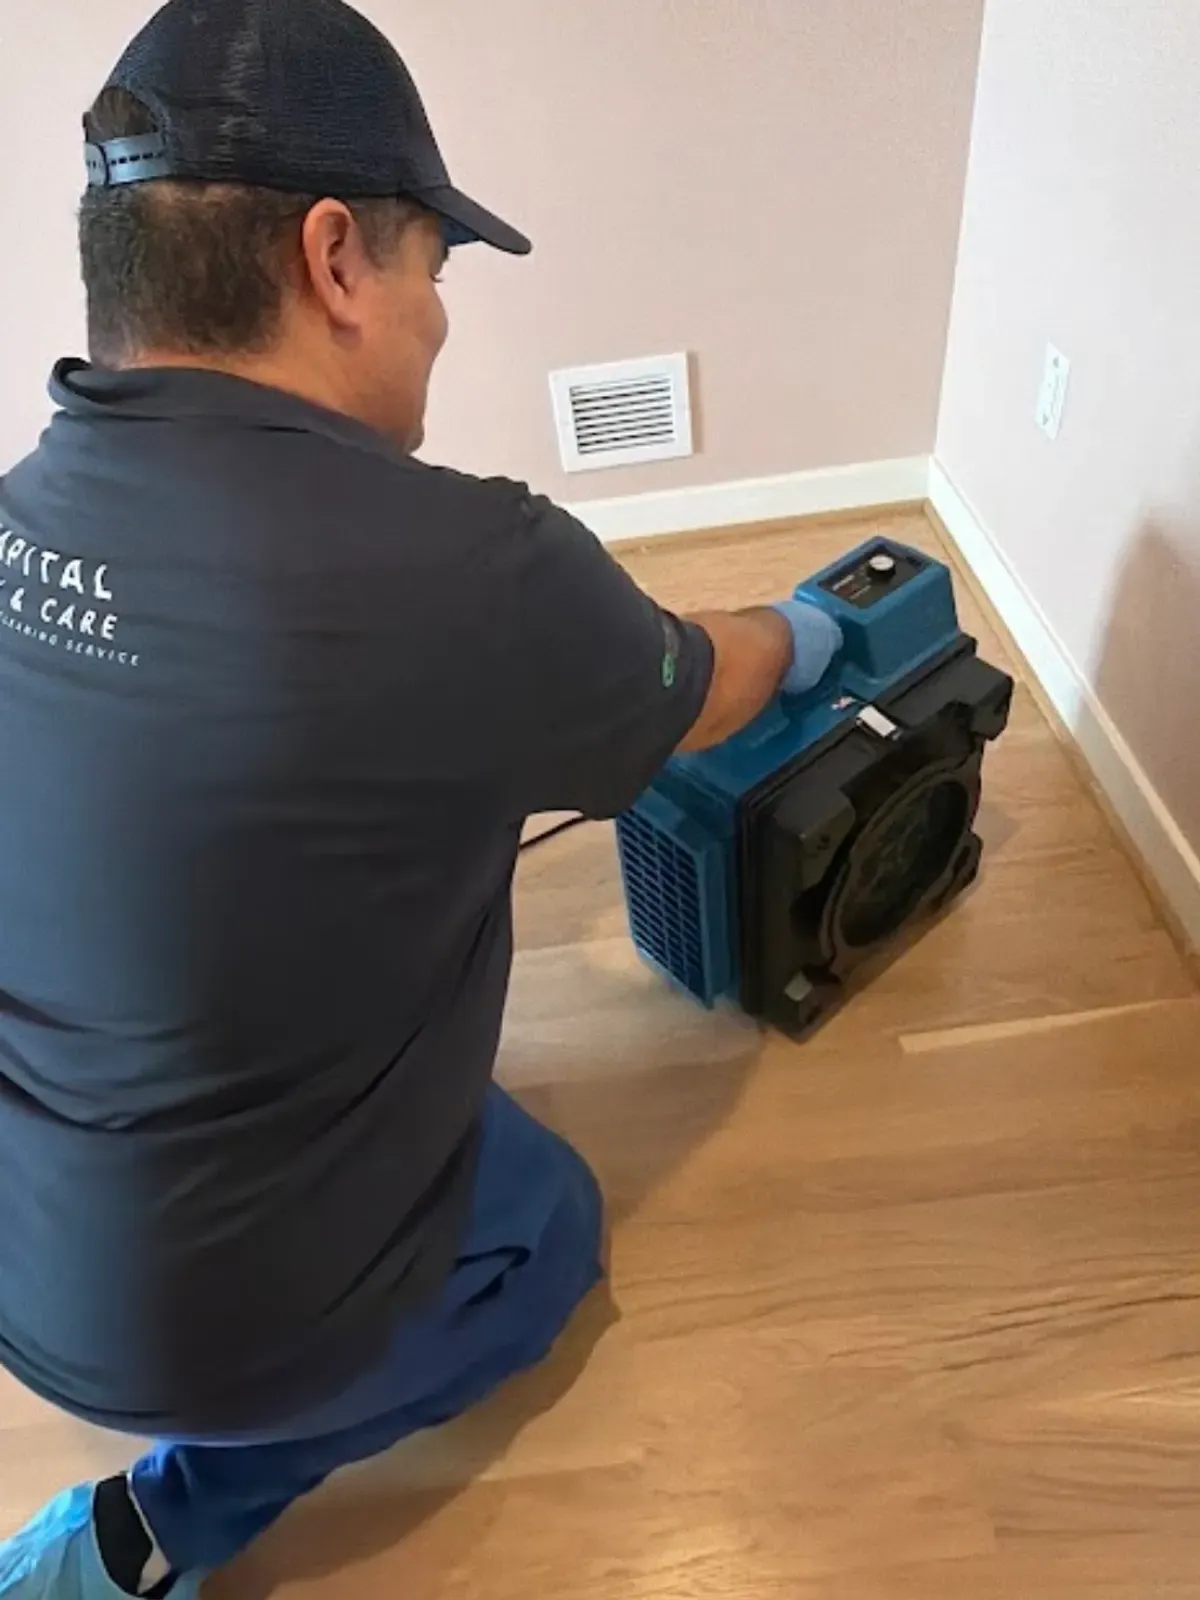
The machine in the photo and the video is demonstrating this final pass only. It is not a dust-removal tool: dust removal is steps 2 to 4, and it is dry.
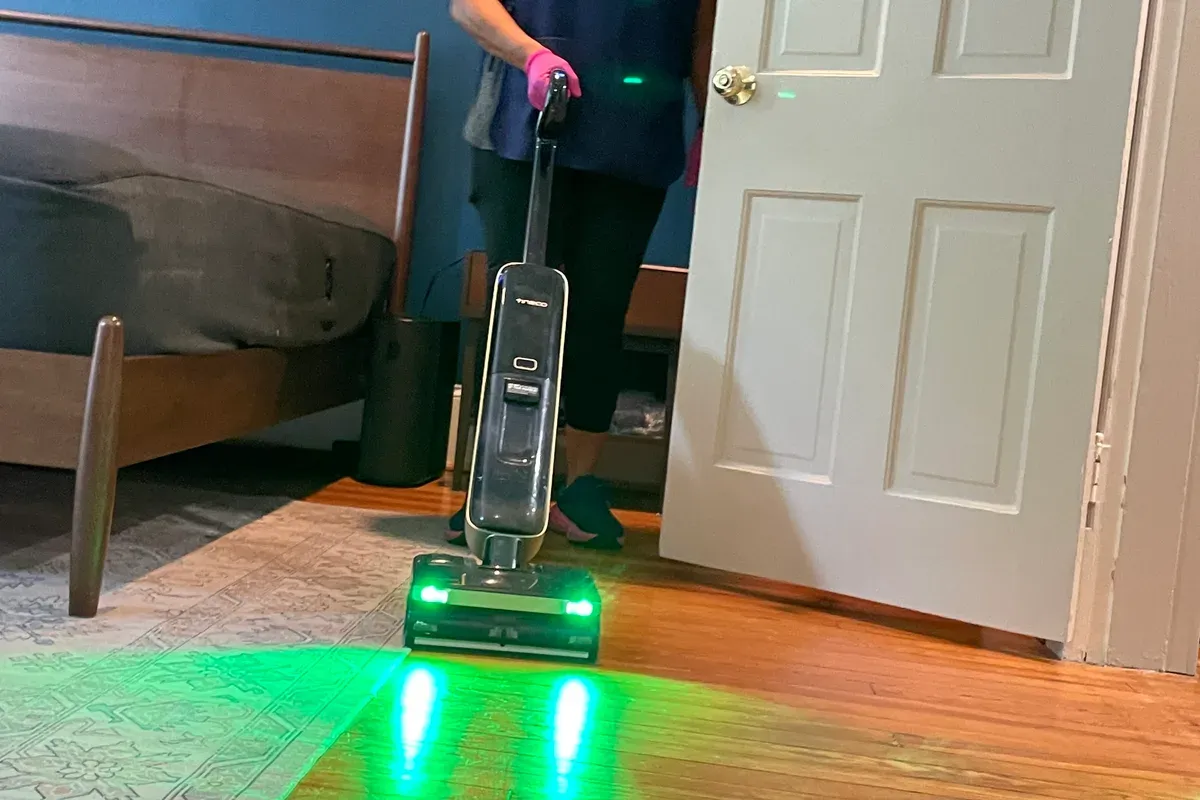
Owner-provided photo of a Capital Clean Care team member demonstrating the controlled-moisture final pass on sealed hardwood (step 6). The machine is used only for this pass, after dry removal and HEPA vacuuming; it is not the dust-removal tool. 7Dry, buff and quality check
Any moisture left on hardwood is a risk to the finish and the boards, so towel or buff each section dry with clean microfiber as soon as it is done. Then repeat the side-light inspection one last time, check the seams and edges, and note anything that stayed behind so it can be handed to the right trade. Ask whoever managed the renovation to check the HVAC filter: construction dust loads it heavily, and a clogged filter can keep recirculating fines onto a clean floor.
Silent demonstration (9 seconds, no narration): owner-provided video of a Capital Clean Care team member demonstrating the controlled-moisture final pass on sealed hardwood, step 6 of the process. Steps 2 to 4 (dry removal and HEPA vacuuming) always come before this pass.
What should you never use on hardwood floors after construction?
- Steam mops. Heat and moisture driven into seams and under the finish. The NWFA advises against them on wood floors at any time; after construction the steam also sets compound dust into a film.
- Wet mops and buckets. Standing water on wood, and a slurry of dust that runs into every joint. Even on sealed floors, the pad should be wrung nearly dry.
- Vinegar, ammonia, all-purpose degreasers and dish soap. Not finish-safe. Acids and alkalis dull polyurethane over time, and soaps leave a residue that grabs the next layer of dust.
- Abrasive pads, scrub brushes and metal blades. They can scratch or remove the finish along with the residue, and finish damage is not reversible by cleaning.
- Dry sweeping of fine dust. A broom lifts the smallest particles into the air and leaves the grit that scratches. Vacuum with HEPA filtration instead.
- Shop vacuums without HEPA filtration. They capture the visible debris, but the finest particles may pass through the filter and recirculate into the room through the exhaust.
- Oil soaps, polishes and 'restorers' as a shortcut. They can leave a film that looks like shine for a week and can cause adhesion problems if the floor is ever recoated. Use only what the finish maker approves.
- Any solvent chosen because a video said so. Mineral spirits, acetone and citrus removers can each attack some finishes. The floor or finish manufacturer's guidance comes first.
How do you handle paint, adhesive, and grout haze on hardwood?
After two dry passes, what remains is residue rather than dust, and each kind has a safe first action and a point where cleaning should stop. Test in a hidden spot first, follow the floor and finish manufacturer's instructions, and accept that paint or adhesive on a finish cannot be removed with zero risk: if the finish comes off with the residue, that is a flooring professional's job.
| Residue or sign | Safe first action | Stop and escalate when |
|---|---|---|
| Grey or white film that reappears after cleaning | Another dry HEPA pass; inspect with side light; check the HVAC filter with the renovation manager | Film keeps returning after two or three cycles and the HVAC filter is clean: air is still carrying dust from an unfinished area |
| Compound or plaster dust in seams and bevels | Crevice tool, then a nearly dry microfiber pad along the grain | Dust is packed into open gaps or a damaged bevel: it may need a flooring pro, not more cleaning |
| Latex paint specks on a sealed finish | Wait for full cure; soften with a drop of warm water and lift with a plastic edge, then wipe | Speck does not lift, or the finish clouds around it: stop. Solvents and blades can take the finish with the paint |
| Tape or underlayment adhesive | Wait for cure; test the finish maker's recommended remover on a hidden spot; small area, short dwell, wipe dry | Adhesive smears instead of lifting, or the test spot dulls: leave it for the flooring or finish professional |
| Grout haze tracked over from tile work | Dry vacuum first; then a pH-neutral cleaner on a nearly dry pad. Never an acidic haze remover meant for tile | Haze is etched into the finish or the wood is bare underneath: refinishing question, not a cleaning one |
| Caulk or silicone smear | Let it cure fully, then roll it off gently with a fingertip or a plastic edge | It has bonded into a raw or worn finish: stop |
| Dull, scratched or grey boards after everything is clean | Nothing further from a cleaning standpoint | This is wear or finish damage. A flooring professional decides between screening, recoating or refinishing |
When should you stop DIY and call a professional?
Some situations are not cleaning problems at all. Stop and bring in the right specialist when the renovation disturbed painted surfaces in a home built before 1978 (possible lead dust, covered by the EPA's lead-safe renovation rules and handled by certified professionals), when older floor tile, sheet flooring or mastic was removed or damaged (possible asbestos: the EPA says it cannot be identified by looking, suspect material should be left undisturbed rather than vacuumed or swept, and inspection or sampling is a job for a trained professional), when large volumes of concrete, tile or stone dust are involved, or when you cannot identify the floor's finish.
Scratches, dull patches, grey boards or a finish that is coming off with the residue are a flooring professional's territory: screening, recoating or refinishing, which no cleaning process replaces.
When the problem is dust at volume rather than damage, professional help is mostly about equipment and sequence. A post-construction cleaning service brings sealed HEPA vacuums, the right pad and cleaner for the finish, and crews who do the two dry passes and the settling check as a routine. That is what our teams do on renovated homes across Maryland, Washington DC and Northern Virginia, and the seven steps above are the hardwood part of that visit.
If you are searching for a hardwood floor cleaning service or a wood floor cleaning service after a renovation, that is the right category to look in; it is not the same as hiring a flooring contractor, and a good cleaning company will say so when a floor needs one.
For the wider job, room by room, see our post-construction cleaning guide for Montgomery County. For ongoing care once the dust is gone, the routine in our guide to cleaning hardwood floors naturally is the one to keep.
Capital Clean Care
Renovation dust on hardwood in MD, DC or Northern Virginia?
Post-construction cleaning with sealed HEPA equipment and a finish-safe final pass. Written scope, background-checked team, free quote.
Frequently asked questions
How do you get drywall dust off hardwood floors?
Dry first, always. Clear high surfaces and trim, then vacuum with a sealed HEPA vacuum on the bare-floor setting with the brush roll off, working along the grain and into the seams. Let the room settle, check with a low flashlight, and vacuum again. Only after that should a nearly dry, pH-neutral microfiber pass touch a sealed floor. Water on unremoved drywall dust can turn it into a paste that dries as a haze.
Can I use a steam mop on hardwood floors after construction?
No. The National Wood Flooring Association advises against wet mops and steam mops on wood floors because moisture and heat can drive into seams, cloud the finish and swell the boards. After construction, steam can add moisture to remaining compound dust and leave haze while also risking seams and the finish. Use a nearly dry microfiber pad on sealed floors, and nothing wet at all on oiled or waxed floors.
What kind of vacuum should I use for construction dust on wood floors?
A vacuum with a sealed HEPA filter, a soft bare-floor brush and a beater bar that can be turned off. A standard household vacuum or a shop vacuum without HEPA filtration may pass the finest particles through its filter and recirculate them into the room. If the work involved cutting concrete, tile, stone or block, the dust may contain respirable crystalline silica, and OSHA's housekeeping rule for that material calls for HEPA-filtered vacuuming rather than dry sweeping.
When is it safe to mop hardwood floors after construction?
After two dry passes have come back clean on a white cloth, and only on a floor with an intact surface seal. Even then it is not a mop-and-bucket job: a pH-neutral hardwood cleaner on a pad wrung nearly dry, one section at a time, buffed dry immediately. If you do not know what the finish is, confirm it with the installer or the flooring manufacturer first, and stop at the dry steps until you do.
What if the house was built before 1978?
If the renovation sanded, scraped, cut or demolished painted surfaces in a pre-1978 home, assume lead-based paint may have been disturbed. The EPA's lead-safe renovation guidance applies, and cleanup is not a regular cleaning task. Stop, keep children and pets out of the area, and bring in a lead-safe certified renovation professional to handle containment and cleanup. Capital Clean Care does not perform lead abatement or lead-hazard cleanup.
When is professional post-construction cleaning worth it?
When the job is dust removal at volume rather than a single room, when there is more than one floor type in the home, when the timeline is tight before move-in or listing photos, or when the first DIY pass left a haze you cannot read. A professional post-construction cleaning follows the dry-then-damp sequence with sealed HEPA equipment and the right pad for the finish. It does not replace a flooring professional for scratches, dull finish or refinishing.
Sources
- National Wood Flooring Association, Wood Floor Maintenance Sweep or vacuum on a bare-floor setting; avoid wet mops and steam mops; use products made for the specific finish.
- OSHA, 29 CFR 1926.1153, Respirable Crystalline Silica (Construction) Housekeeping: dry sweeping and dry brushing are not allowed where they could contribute to silica exposure; HEPA-filtered vacuuming and methods that minimize exposure are required.
- U.S. EPA, Lead-Safe Renovations for DIYers Renovations that disturb lead-based paint in pre-1978 homes can create hazardous dust; guidance on when to stop and use certified professionals.
- U.S. EPA, Protect Your Family from Exposures to Asbestos Asbestos cannot be identified by looking; suspect material should be left undisturbed, and inspection or sampling should be done by a trained professional.
About the photos and video on this page: they are owner-provided photos and video of a Capital Clean Care team member demonstrating the controlled-moisture final pass on sealed hardwood. They illustrate step 6 only. Capital Clean Care provides post-construction cleaning; it does not perform sanding, refinishing, floor restoration, lead abatement or asbestos removal.
Move-in ready floors, without the haze
Our post-construction crews follow the dry-then-damp sequence on applicable sealed hardwood floors whose finish has been confirmed, then hand you a written note of anything that needs a flooring professional.
See Post-Construction CleaningServing Maryland, Washington DC and Northern Virginia